
Corona Ray Switcher material and Ray Switch shader - C4D
In addition to the below content, also see:
Corona Ray Switcher Material
The Corona Ray Switcher material lets you assign different material types for different ray types (GI, reflection, refraction, direct visibility). For example, you can use it to create materials that do not affect the GI, or materials to reduce or increase the color bleeding, or to look different through reflection or refraction.
Material Examples
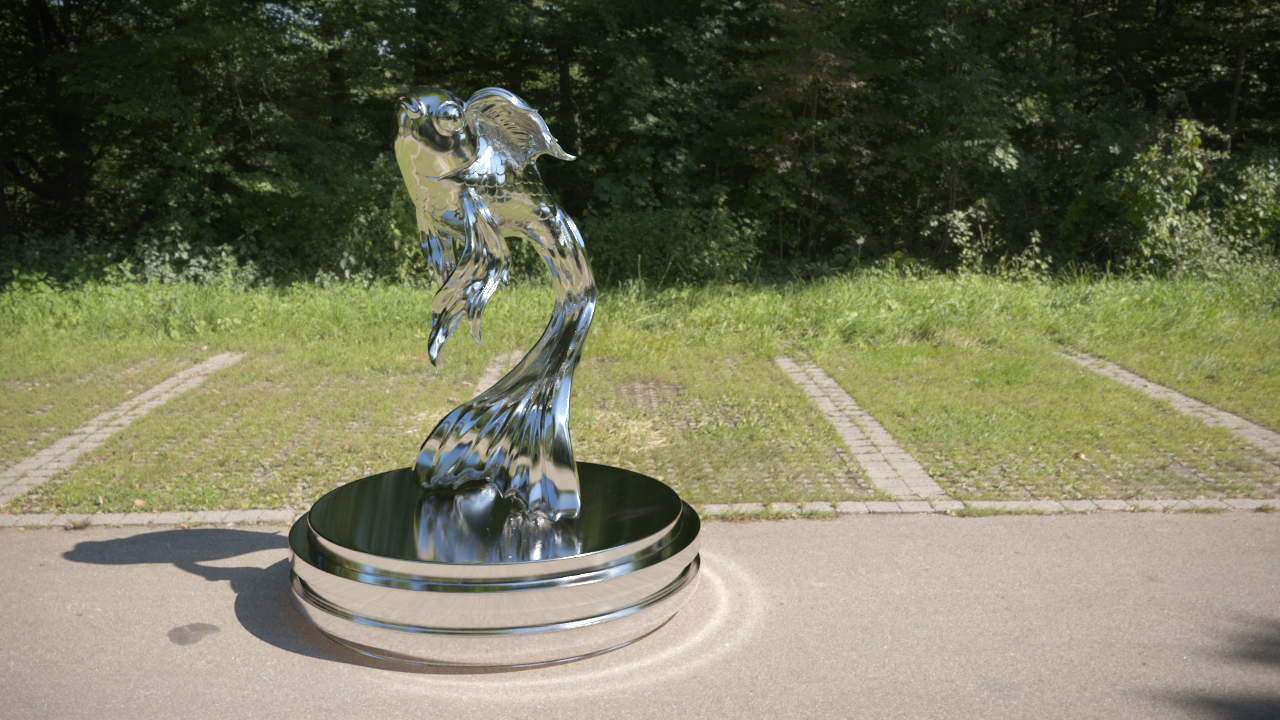
Example A
Reflective object. No Corona Ray Switcher material was used. Visible reflective caustics:
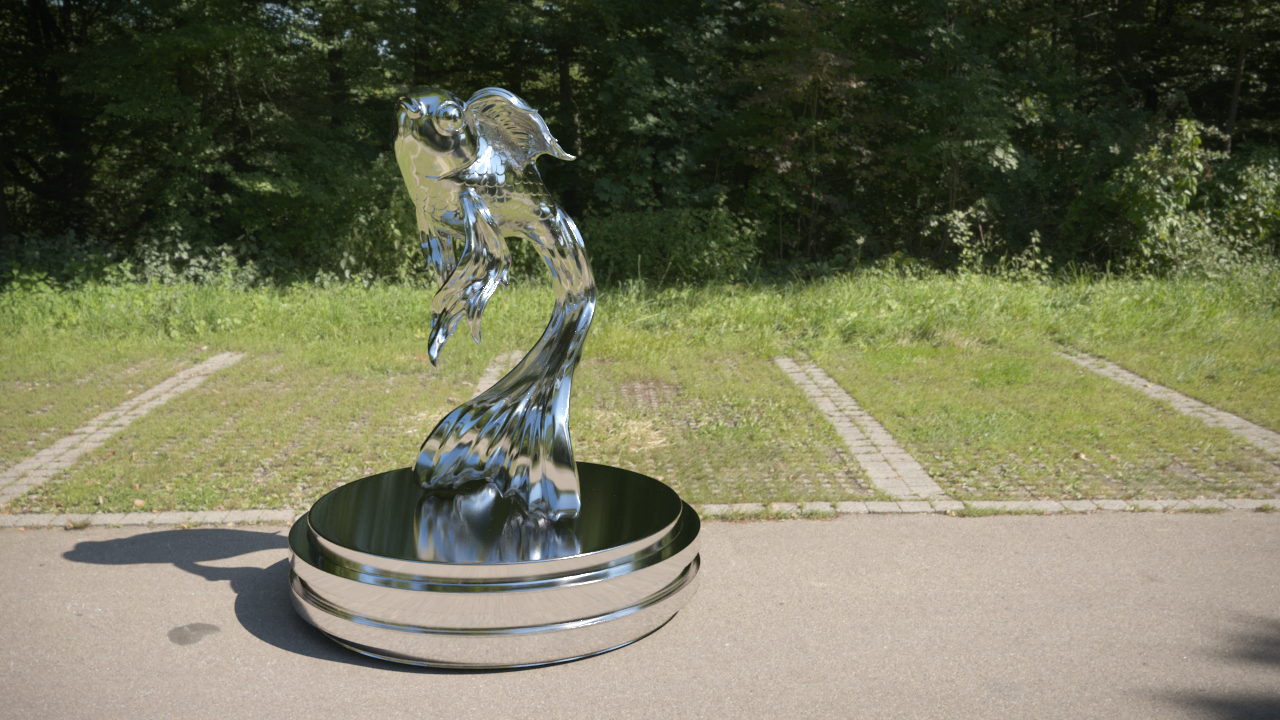
We used a "Non-reflective" material (pure black, no reflection) for the GI rays. The result: No visible reflective caustics.
We used a "Non-reflective" material (pure black, no reflection) for the GI rays. The result: No visible reflective caustics.
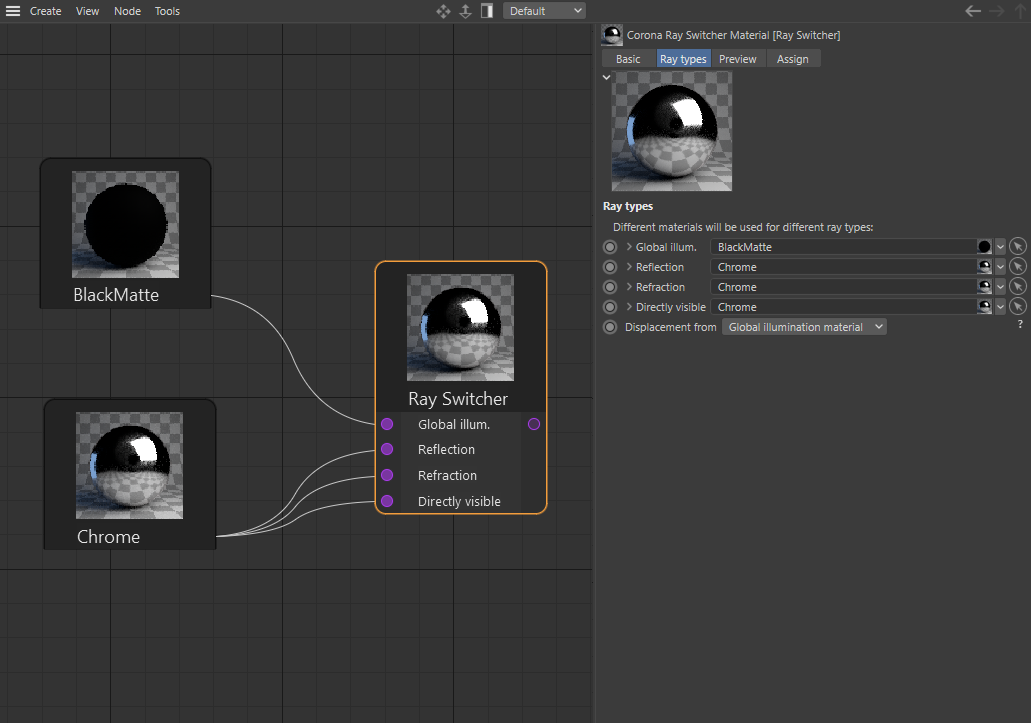
Material setup:
Example B
For this example, we first used coloured plastic material, semi-glossy:
For the modified version, it was only applied to the base of the sculpture, and we used the same coloured plastic material for direct visibility, reflection, and refraction rays. And for the GI rays, we used another material with the Self-illumination channel enabled:
Material Setup:
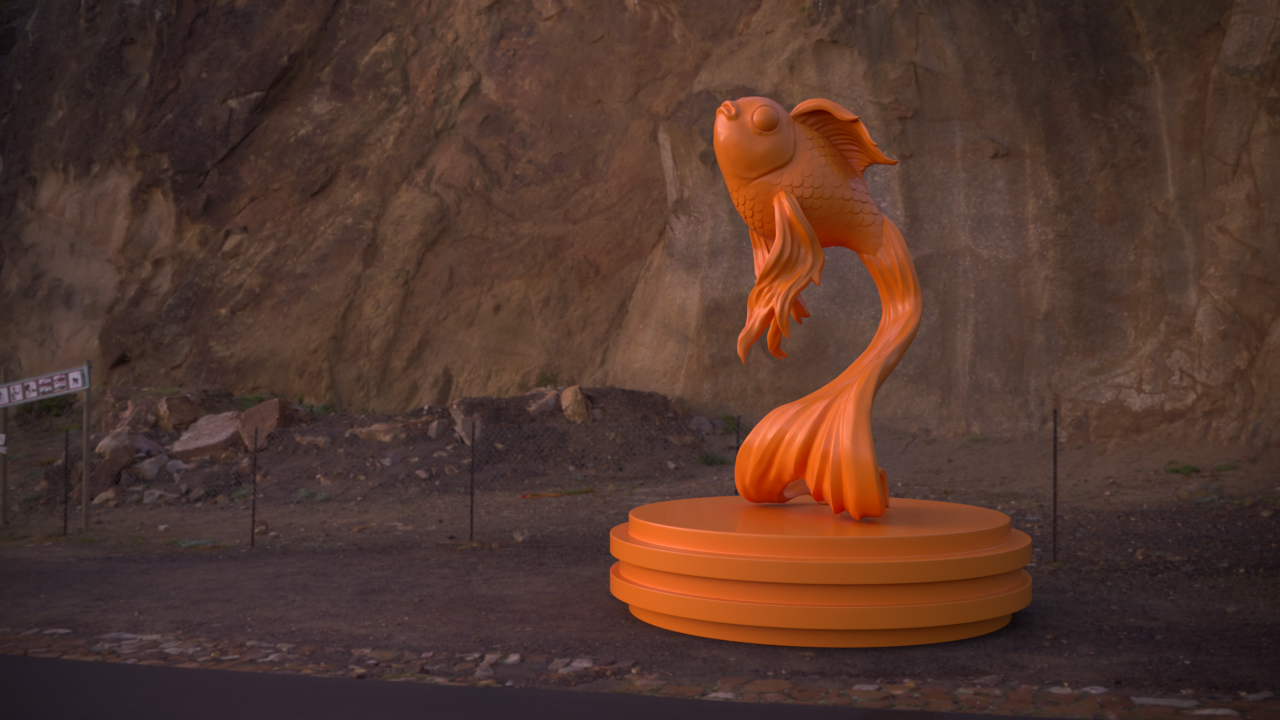
Example C
For this example, we applied to the sculpture a rusted metal material for direct visibility and GI, orange plastic material for reflection, and a magenta matte material for refraction. And for the base, we used a Gold material for direct visibility, a material with the self-illumination channel enabled for the GI and reflection, and lastly, a magenta matte material for refraction:
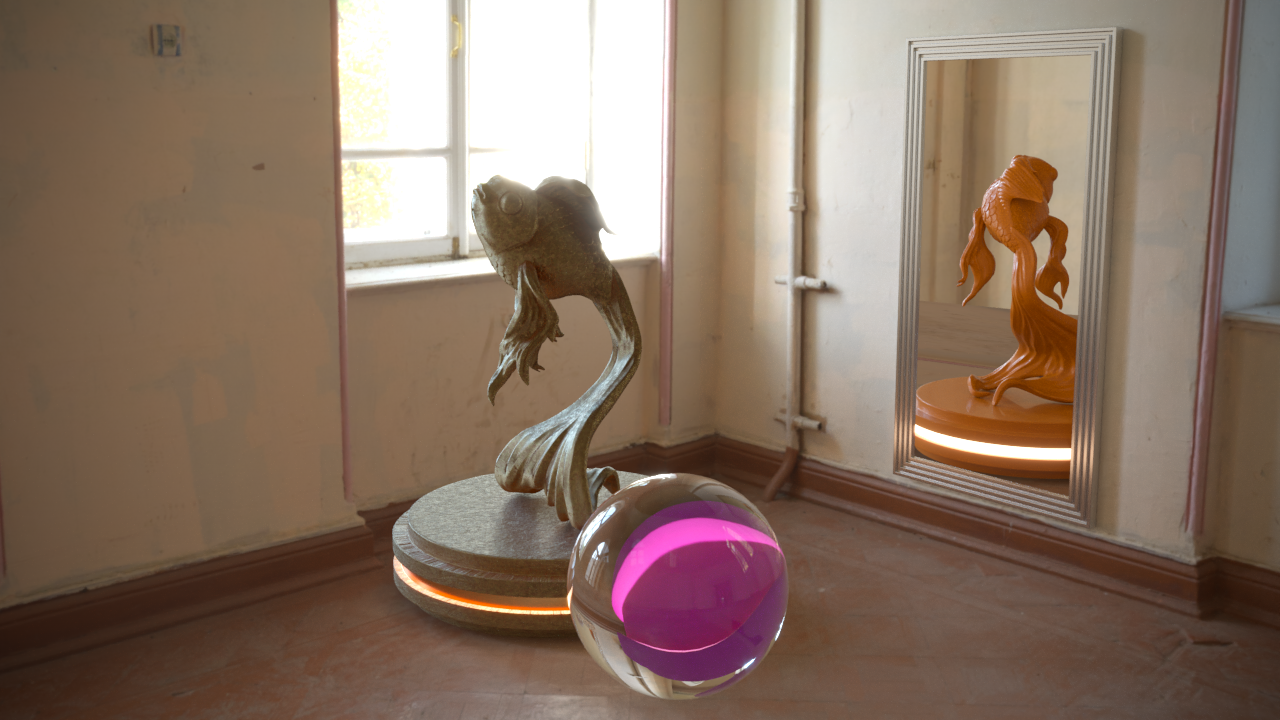
Material setup (sculpture):
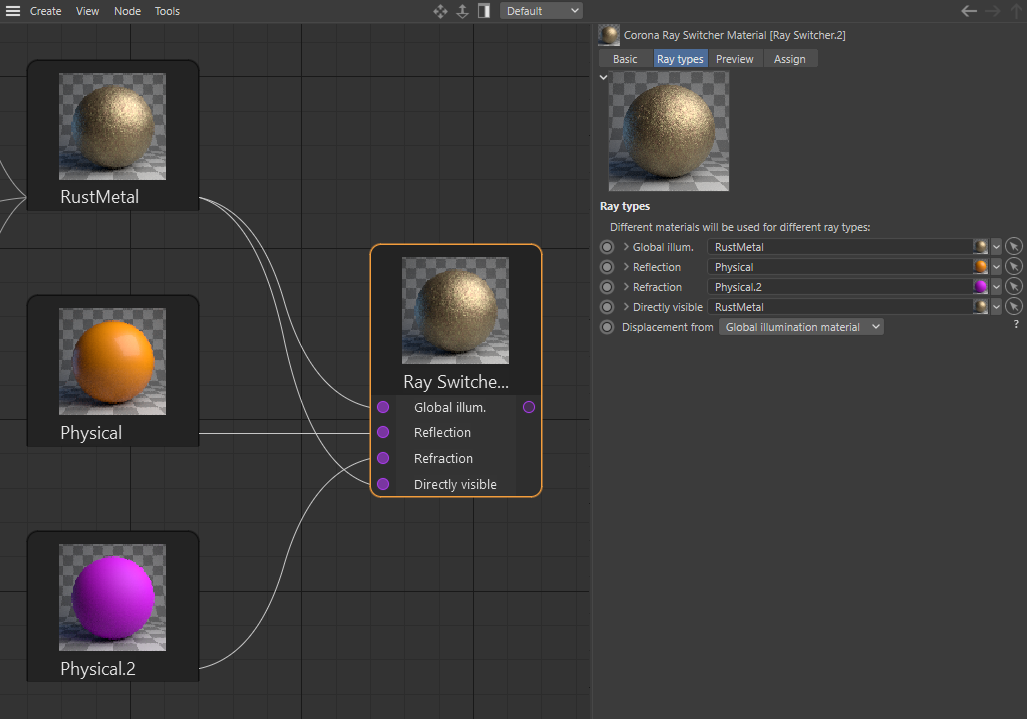
Material setup (base):
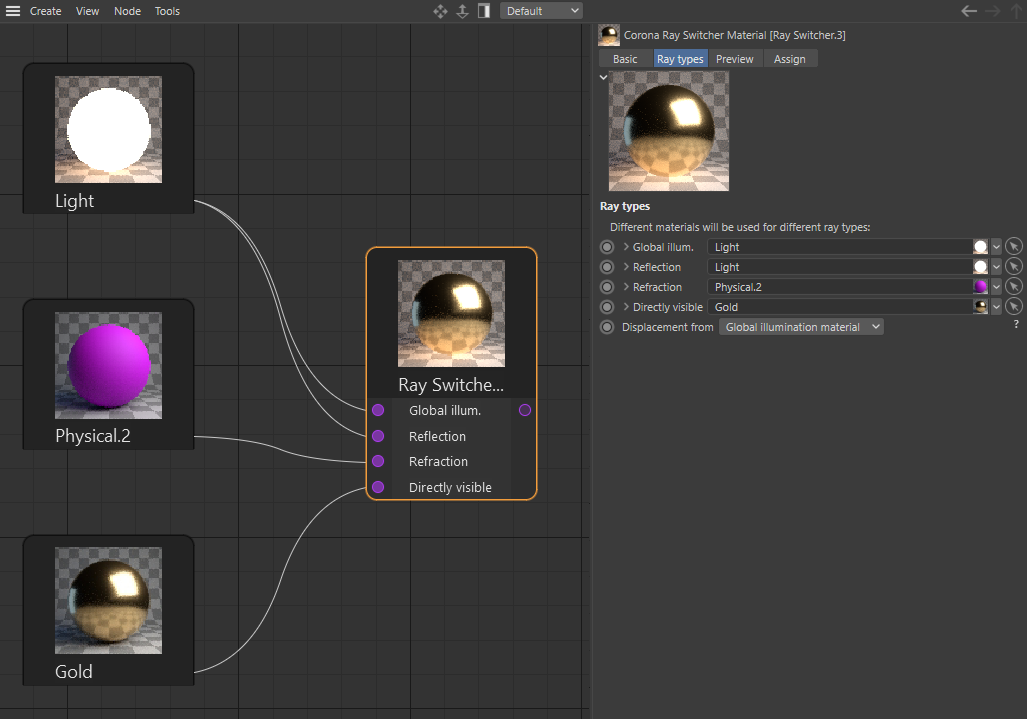
Material setup (base):
Corona RaySwitch Shader
The Corona Ray Switch shader is analogous to the Corona Ray Switcher material. It lets you assign different shaders or solid colors for different ray types (GI, reflection, refraction, direct visibility).
Shader Examples
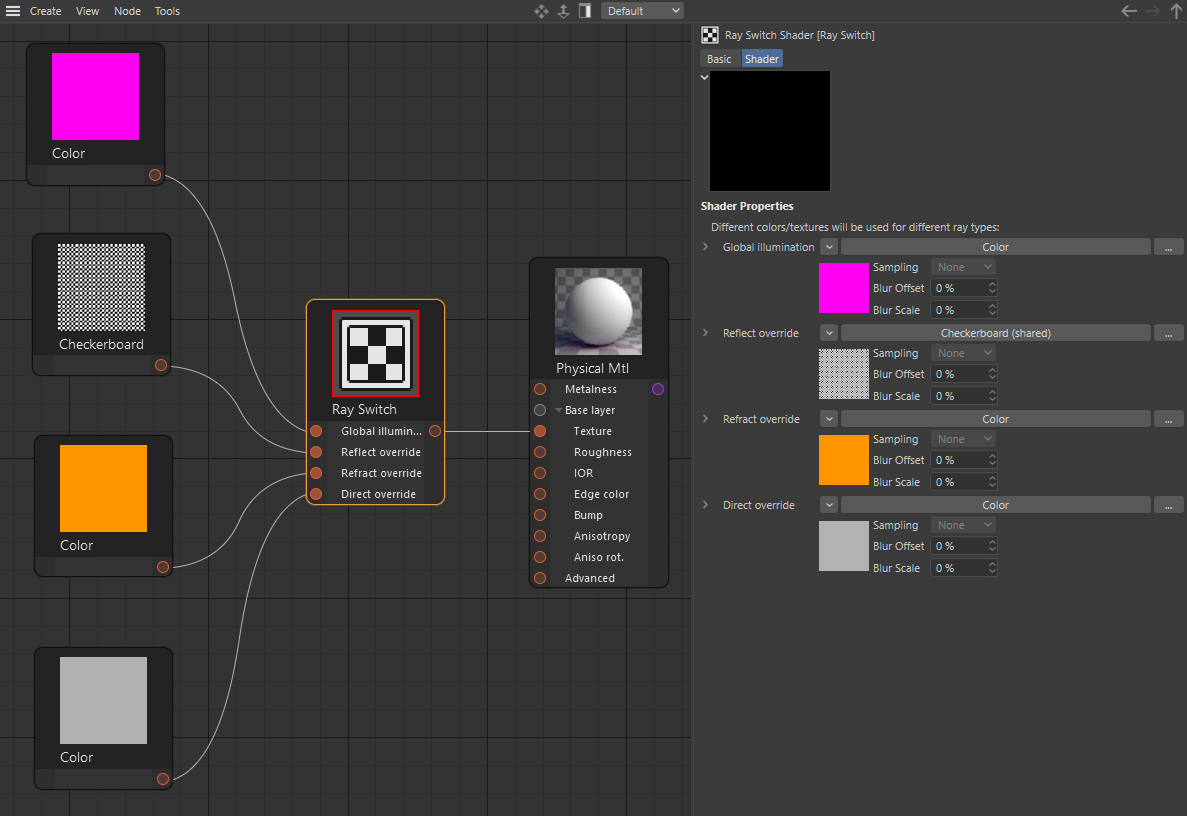
Example A
(Objects)
For this example, a Corona Physical material has been applied to the statue. The following shaders are in use inside the Corona Ray Switch Shader: a Magenta solid color was used for the Global Illumination, a Checkerboard shader was used for Reflections, an Orange solid color was used for Refractions, and a Light grey solid color was used for the Direct visibility:
Simple material without the Corona Ray Switch Shader:
Material using the Corona Ray Switch Shader:
Material Setup:
Example B
(Interior scene)
In this case, the walls and ceiling are monochromatic and slightly reflective; the floor is highly reflective and saturated. We want to get rid of excessive color bleeding and noisy reflective caustics on the walls:
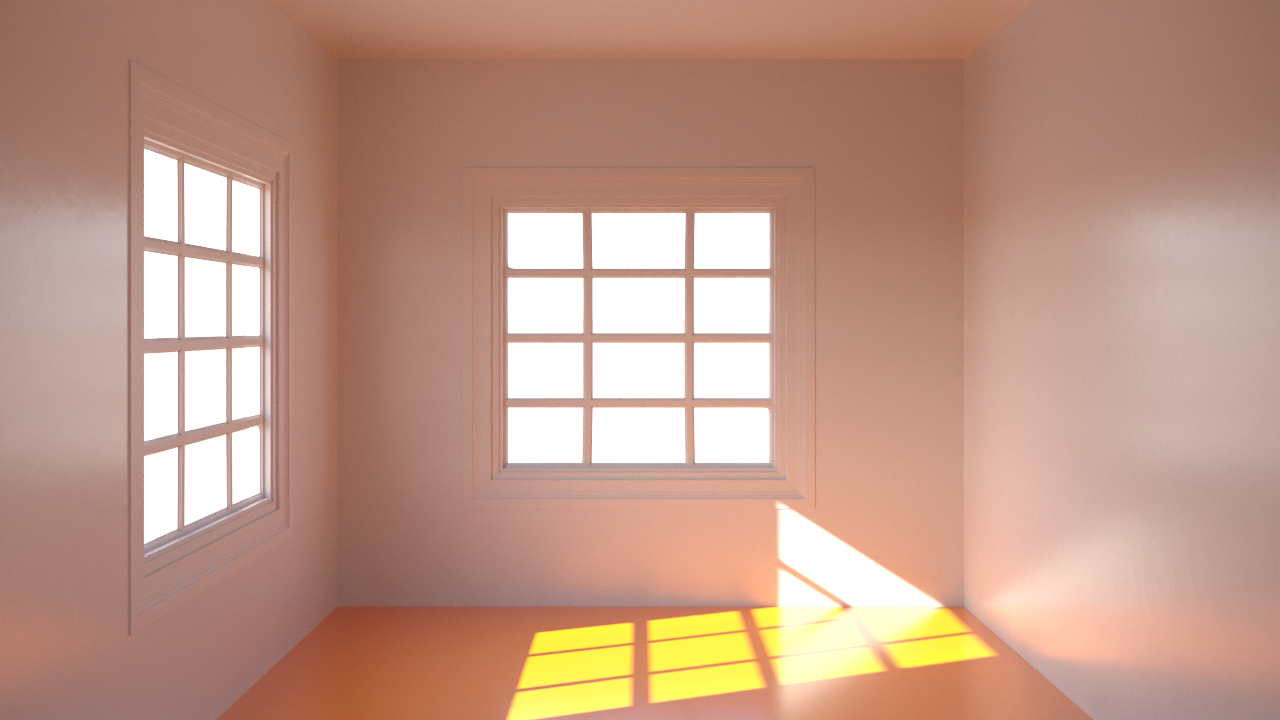
In this case, the walls and ceiling are monochromatic and slightly reflective; the floor is highly reflective and saturated. We want to get rid of excessive color bleeding and noisy reflective caustics on the walls:
| Floor material setup | Wall and ceiling material setup |
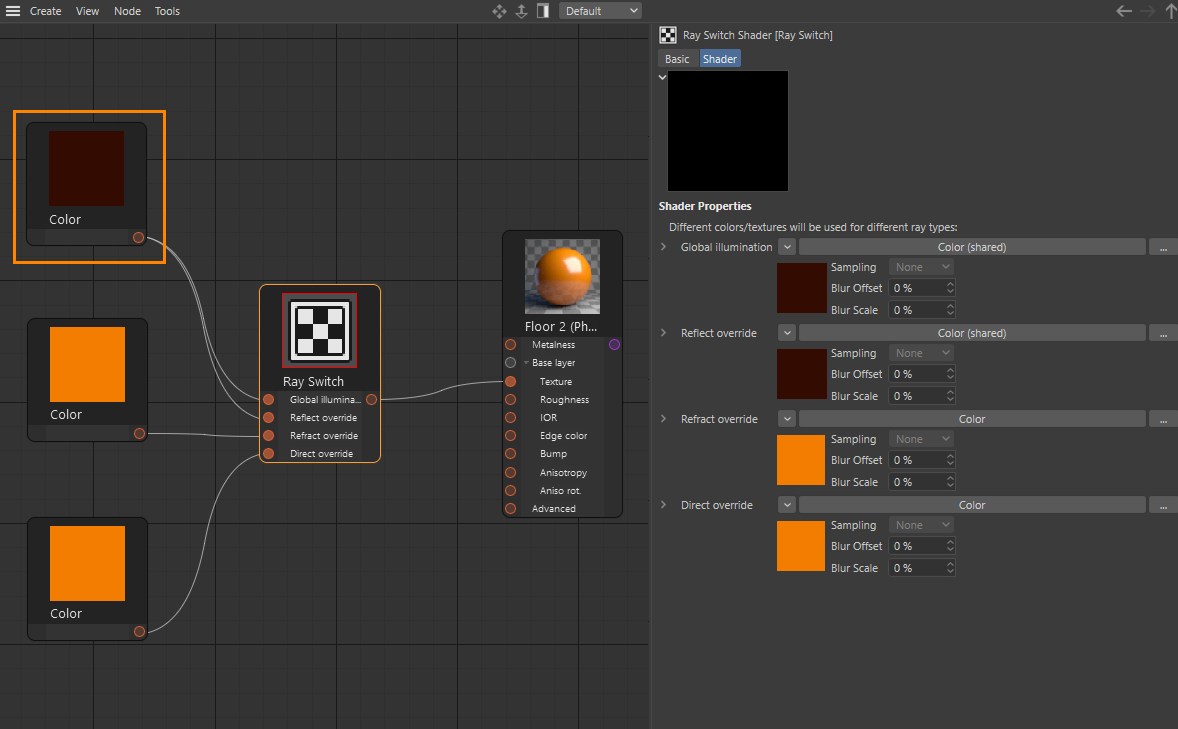
We will use a Corona Ray Switch Shader to reduce the color bleed for the floor material's Baselayer texture. Then, we will use a darkened color for the Global Illumination input slot of the Corona Ray Switch and the previous floor color for the rest of the input slots.
Result:
Material setup:
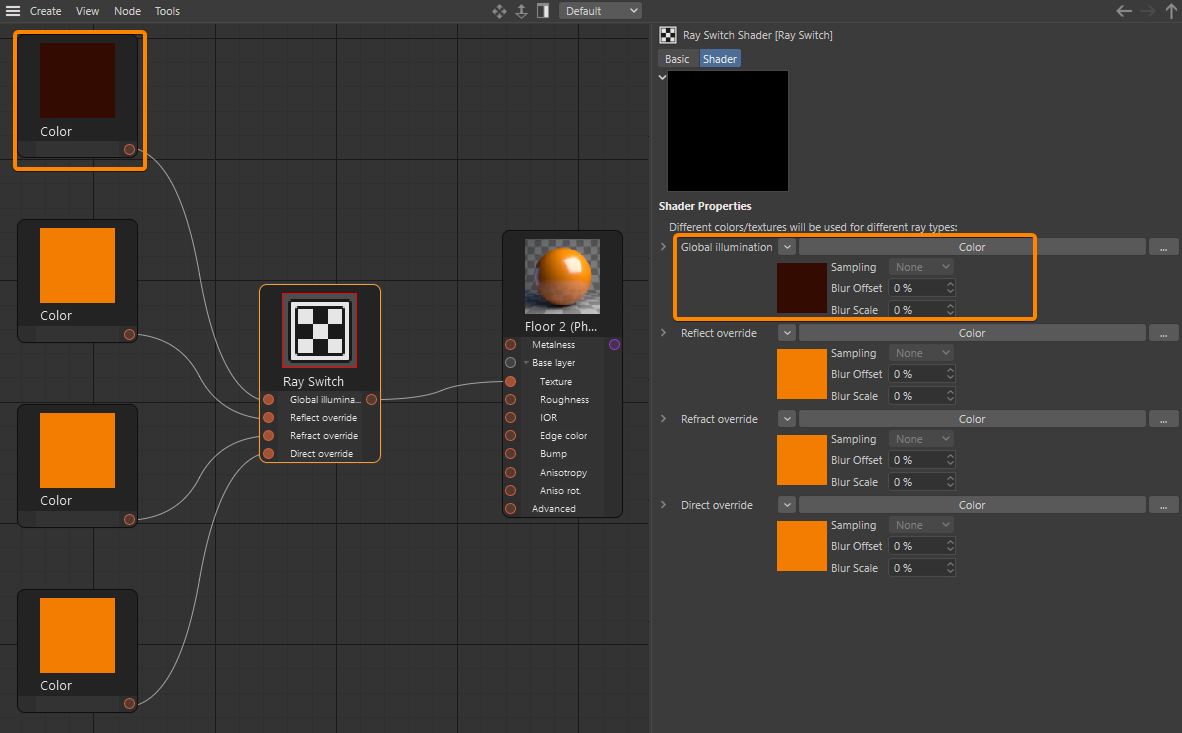
Now let's do the same for the Reflect override input slot from the Corona Ray Switch Shader to dim the floor's colorful reflections in the walls:
Result:
Now let's do the same for the Reflect override input slot from the Corona Ray Switch Shader to dim the floor's colorful reflections in the walls:
Result:
Material setup:
Additionally, we can repeat the process for the material applied to the walls.
Additionally, we can repeat the process for the material applied to the walls.
Before and After comparison:
The end result, after the same amount of passes, is less noisy and renders slightly faster while preserving the direct visual appearance of materials. It is not physically correct, though.
| Original image. |
| The applied materials are using the Corona Ray Switch Shader. |
See also:
- Corona Ray Switch Shader at Chaos Docs
- Corona Rayswitcher Material at Chaos Docs
- How to use Caustics in Cinema 4D?
- Corona Physical Material - C4D