
Creating water caustics in a swimming pool
This guide demonstrates how to create and use water caustics in a swimming pool. You will learn about creating the water material, setting up lighting, and configuring render settings for the desired effect.
While this guide was created in SketchUp, the approach shown here is entirely usable in V-Ray for Rhino as well.
An example of the final result of adding caustics to a swimming pool.
Download files
An archive of the project file for this guide can be found here.
Some Cosmos assets may be missing. The V-Ray Asset Editor > Geometries menu will allow you to download them, after which, you will have to restart SketchUp for the effects to take place.
Understanding refractive caustics
Refractive caustics are a phenomenon that occurs when light passes through a transparent or translucent object, such as a glass or a water surface and forms bright and focused patterns on surrounding surfaces.
Caustics are everywhere in the real world. In computer graphics, caustics refer to any light contribution that travels from a light source to a specular (reflective or refractive) surface, then to a diffuse surface, and finally reaches the observer's eye or camera.

Example of refractive caustics
To learn more about caustics and how to render them effectively, visit this page on caustics and rendering techniques.
Creating the required objects
The focus of this tutorial is on creating caustics suitable for a body of water, a pool in this case. To achieve this, appropriate geometry for both the pool and water needs to be established. The water geometry will consist of a basic plane with displacement applied to it, using a Noise texture or a custom wave texture for the irregularities.

Example of how the setup should look
To generate the pool caustics, ensure you have the following items:
- Refractive material
- Light source
- An object that will catch the caustics
- Displacement
Note: Adding Displacement is not mandatory for caustics to work. Displacement is used here to create an irregular water surface, but regular geometry shaped like a water surface can also be used.
Displacement creation process
To create a Displacement effect, follow these steps:
- Select an appropriate texture for displacement;
- Adjust the Amount value to achieve the desired intensity;
- Apply the Displacement to the water plane after selecting it.

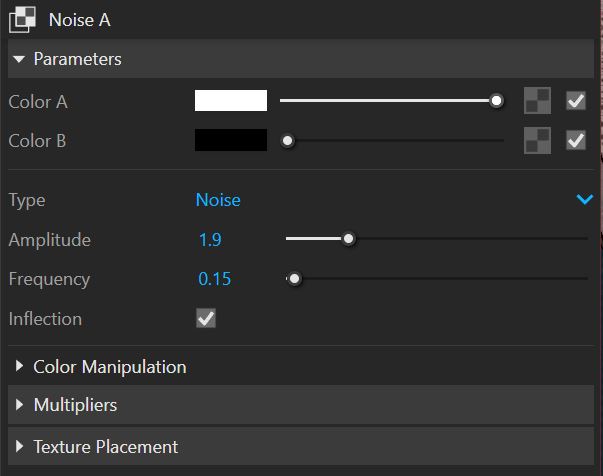
In this example, the procedural Noise A texture is used, which is available in V-Ray:
Creating water material
To create the materials for the pool body, such as the blue tiles, you can use resources from the Chaos Cosmos Browser. The choice of materials for the pool body is based on personal preference.
-
Start with a simple Generic VRayMtl material:
-
Enable the Advanced Settings to access additional parameters necessary for creating a water material:
-
In the Diffuse rollout, set the Color to black:
-
In the Reflection rollout, set the Reflection Color to pure white and the Reflection IOR to 1.33:
- In the Refraction rollout, set the Refraction Color to pure white and the IOR to 1.33.
- Leave the Depth (cm) at 0. You can adjust this value for different effects. The Fog Color parameter allows you to add a tint to the water and is intensified by increasing the Depth (cm).
- Disable the Affect Shadows parameter to ensure water caustics function correctly:


Lighting setup
To illuminate your scene effectively, you can use the default Sun. However, for a unique environment, utilize the V-Ray’s Light Gen tool. This demonstration will focus on the Exterior option, ensuring the sun rays hit the water directly to generate caustics. Select the Light Gen variant accordingly.
- Generate Light Gen scenarios and select the one that you like. Double-click your chosen Light Gen variant. This action will add a V-Ray Dome Light to your scene. The Exposure Value in the render settings will adjust automatically.
- Adjust Caustic Photons in the Dome Light:
- Caustics Subdivs - The higher the value, the sharper and more defined the caustics will be. This will have a negative effect on the rendering times.
- Target Radius and Emit Distance will enlarge or decrease the area where the Caustic Photons are emitted from and where they are hitting. If the water in the pool is oddly illuminated as if in a spherical shape, these values should be increased.

- Enable Caustics switch in the Global Illumination rollout of the Render settings:

Render the pool scene to see the effects.
See also