(Here you can find the example scene file used. Please note that the scene file is made with 3ds Max 2022 (saved for 3ds Max 2019) and Forest Pack version 7.1.2.)
This article covers the following topics:
-
Caustics basics;
-
How to make caustics in a swimming pool;
-
How to make water caustics.
Caustics basics
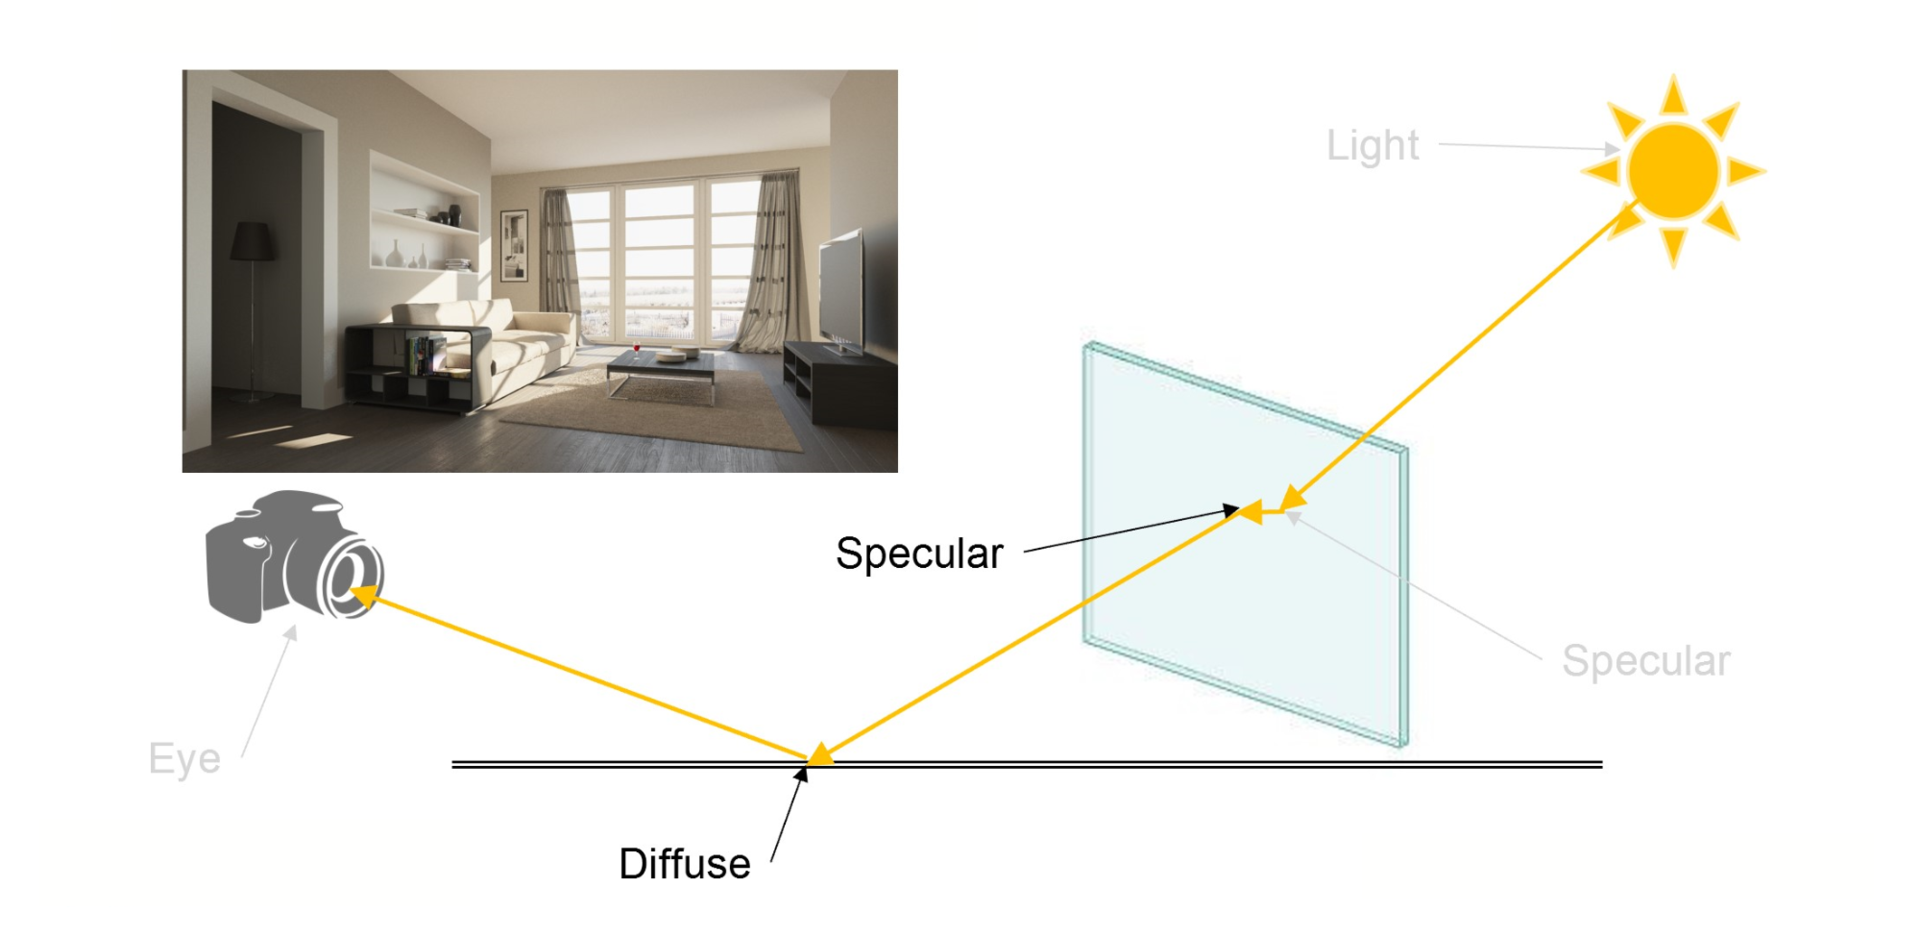
Caustics are everywhere in the real world. Most people think caustics is the light that gets focused through glass or water. For computer graphics, caustics are any light contribution that goes from a light source to specular (reflective or refractive) to diffuse surface, to the camera (eye).
Here is an example of this:

Please be aware that caustics need extra effort to compute when rendering. In V-Ray, there are two ways for computing caustics - Photon mapping (old way) and Progressive caustics (new). Here we will focus on using the new approach for caustics. Please note that the new Progressive caustics are a work in progress, so in case you find any issues with them, please report them to us here.
You can find out more detailed explanation in our article here.
Creating the required objects.
In general, you will need those things to have caustics:
- Refractive material with affect shadows turned off.
- Light source. A small bright light source will produce sharp caustics
- An object that will catch caustics - plane, pool geometry and etc.
In this tutorial, we will make swimming pool caustics. For this, we need to have a body for the pool - object, an object for the water, and a sharp light to create caustics. The object for the water should have a VRayDisplacement modifier applied to the top polygons to achieve more realistic caustics. You can use a Noise texture or any waves texture you like. The object for the water could be a closed geometry (box) or a plane. Here is an example of those objects:
Creating the required materials.
For the water material, we will use VRayMtl with the water preset in V-Ray 5. You need to disable Affect shadows in order to generate caustics. Here is an example material:
For the other objects, you can have any support materials of your choice. You can use tiles materials from the V-Ray Material library. There are tiles for pools that we will use in this tutorial.
Adjusting settings and rendering.
Now we are at the final step. We will use the new caustics mode - Progressive. Those caustics do not require almost anything to set up. You need to use a Progressive Image Sampler for them, they will not work with Bucket Image Sampler. Here is where you can enable progressive caustics in V-Ray 5:
You can modify the multiplier of the caustics in expert settings in case you would like the effect to be more visible:
For the light source - VRay Sun you need to make sure the photon emit radius will cover the area you would like caustics to be calculated. Here is an example of where to adjust that:
You can also use other light sources (small and bright). Adjust the angle of the light so you can achieve different caustics results. Here is an example:
Please note that the caustics need a few passes to render so they could be calculated. In other words, it is expected to see caustics after a few passes (you can see the screenshot above the pool is dark at the first passes).